The dstack-vmm is running now. Open another terminal and go to the kms/dstack-app/ directory:
Configure Environment Variables
Edit the .env file with required variables:
Important: Set the KMS_CONTRACT_ADDR to the address from the previous step and ensure IMAGE_DOWNLOAD_URL points to the correct dstack OS image for hash verification.
Run deployment script again:
After configuring the .env file, run the script again to deploy:
App compose file created at: .app-compose.json
Compose hash: ec3d427f62bd60afd520fce0be3b368aba4516434f2ff761f74775f871f5b6e3
Deploying KMS to dstack-vmm…
App ID: ec3d427f62bd60afd520fce0be3b368aba451643
Created VM with ID: f5299298-bf4f-43c0-839c-88c755391f3cMonitor KMS Deployment
Check KMS CVM Status:
Wait for KMS Ready Signal:
br-1df48b1c448a: port 2(veth36ab5cb) entered forwarding state
app-compose.sh[882]:  Container dstack-kms-1  Started
app-compose.sh[688]: Pruning unused images
app-compose.sh[8347]: Total reclaimed space: 0B
app-compose.sh[688]: Pruning unused volumes
app-compose.sh[8356]: Total reclaimed space: 0B
[  OK  ] Finished App Compose Service.
[  OK  ] Reached target Multi-User System.
Starting Record Runlevel Change in UTMP…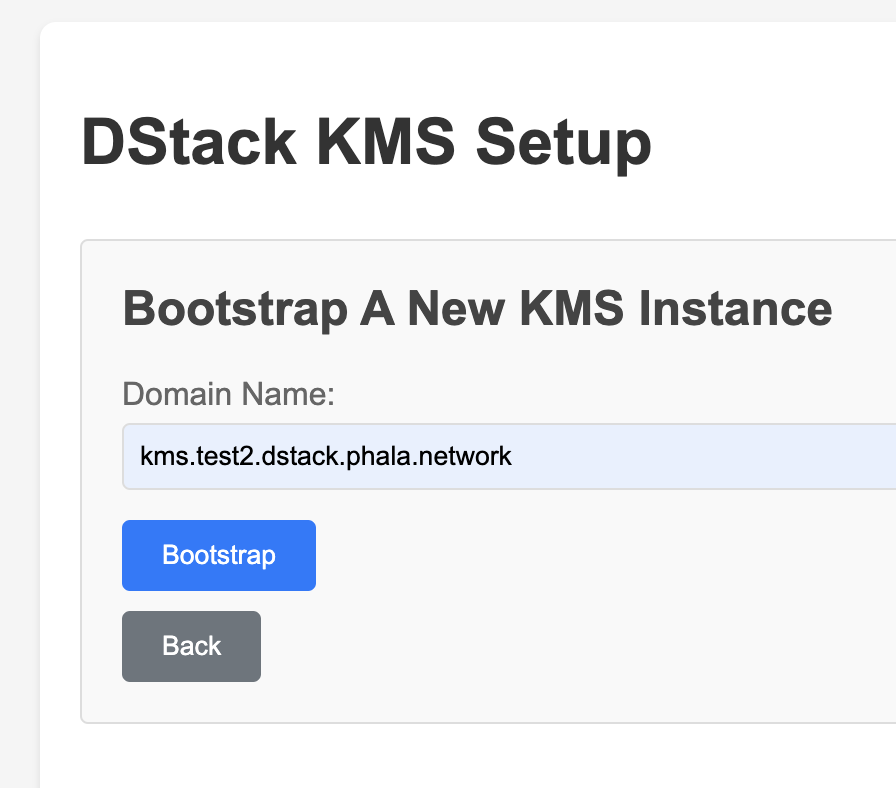
[ OK ] Finished Record Runlevel Change in UTMP.KMS Bootstrap Process
Access KMS Interface
Open your browser and navigate to:
- Click the Bootstrap button
- Fill in the domain serving the KMS (e.g.,
kms.test2.dstack.phala.network) - Click [Bootstrap] → [Finish setup]
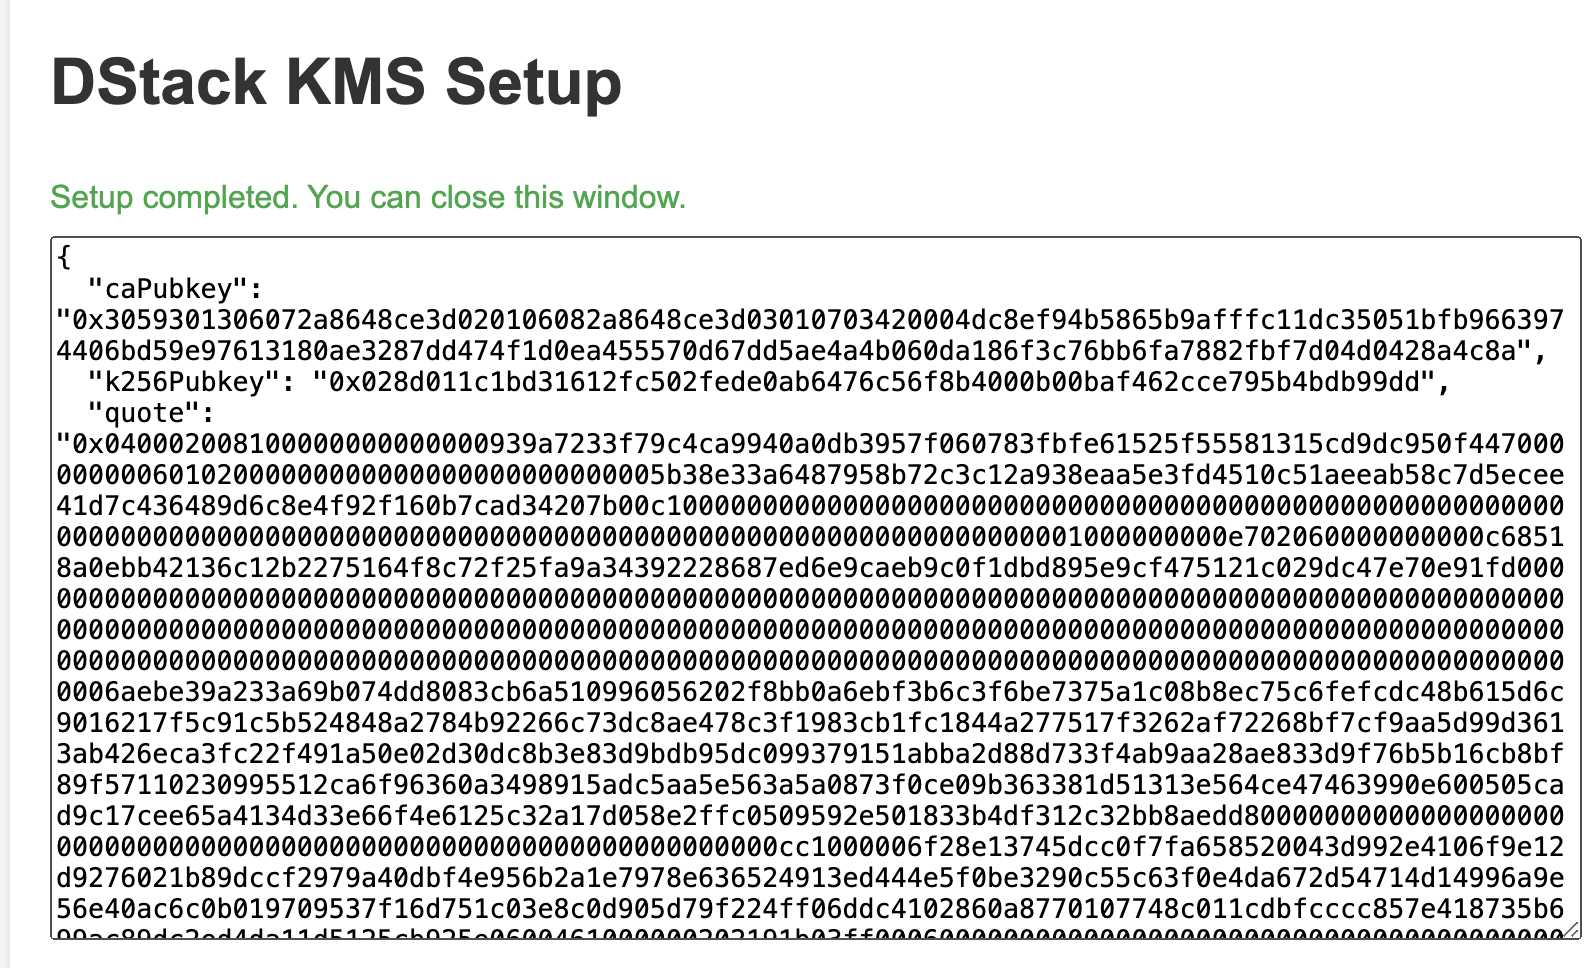
Bootstrap Result
After successful bootstrap, you’ll see the public key and corresponding TDX quote:
Next Step: Set the KMS info in the kms-auth-contract using the displayed values.
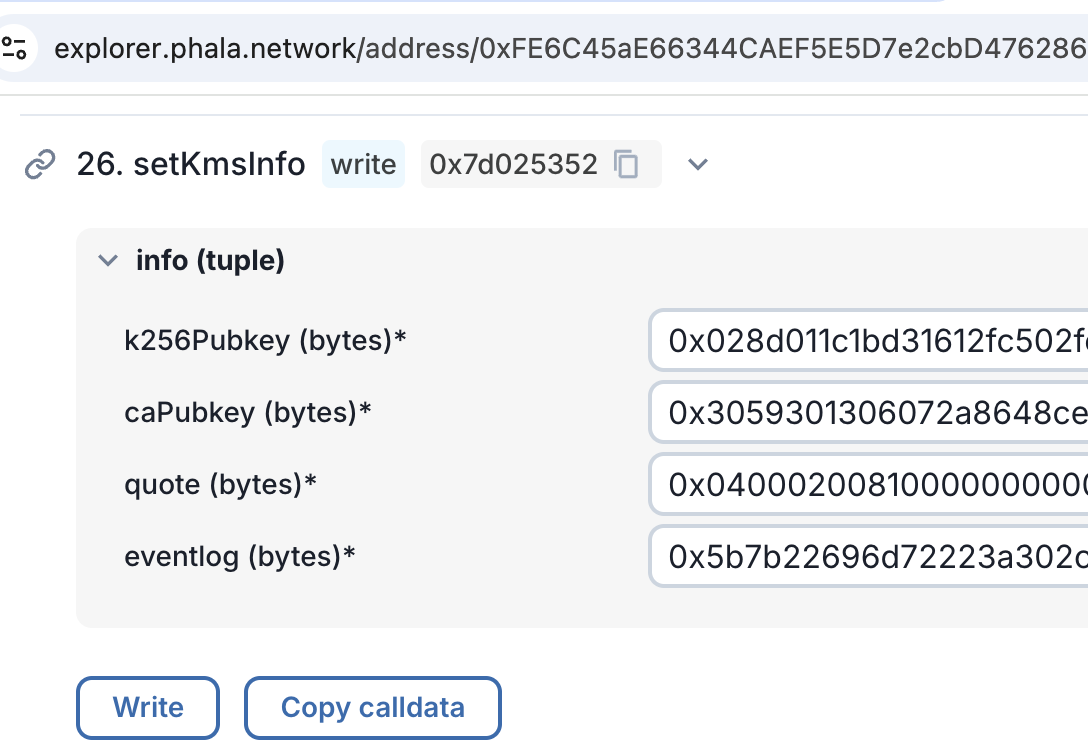
Configure the KMS info in the auth contract interface
Success! The KMS instance is now ready to use.