> ## Documentation Index
> Fetch the complete documentation index at: https://phalanetwork.mintlify.site/llms.txt
> Use this file to discover all available pages before exploring further.

# Getting Started Now

> this is how you and a remote host can quickly deploy apps to dstack

# Quick Start: Jupyter Notebook on dstack

This is an exact guide on deploying a Jupyter Notebook on dstack where step by step we install, build and run the dstack straight from our local host,
and then we will be able to access our own TDX VM with Jupyter Notebook running on it.

<div style={{ width: '100%', display: 'flex', justifyContent: 'center', margin: '2rem 0' }}>
  <img src="https://mintcdn.com/phalanetwork/EDH2CSxg-w7_HARR/docs/images/note-book-pro.png?fit=max&auto=format&n=EDH2CSxg-w7_HARR&q=85&s=8658bba833116fa2957de3d13ba598a3" alt="Jupyter Notebook Quick Start Banner" style={{ maxWidth: '100%', height: 'auto', borderRadius: '12px', boxShadow: '0 2px 12px rgba(0,0,0,0.07)' }} width="900" height="650" data-path="docs/images/note-book-pro.png" />
</div>

***

<div className="rounded border border-gray-300 p-4 flex flex-col space-y-3 w-full max-w-2xl mx-auto">
  <div className="flex items-center gap-2 mb-1">
    <span className="inline-flex items-center justify-center w-7 h-7 rounded-full border border-gray-400 text-gray-800 font-bold text-base bg-white">1</span>
    <h3 className="font-semibold text-gray-900 text-base tracking-tight">Open tunnel & access dashboard</h3>
  </div>

  <CodeBlock language="bash">
    {`ssh -L13680:localhost:13680 <user>@<host>`}
  </CodeBlock>

  <div className="text-xs text-gray-600">
    this command lets you access the dstack dashboard running on your remote host.
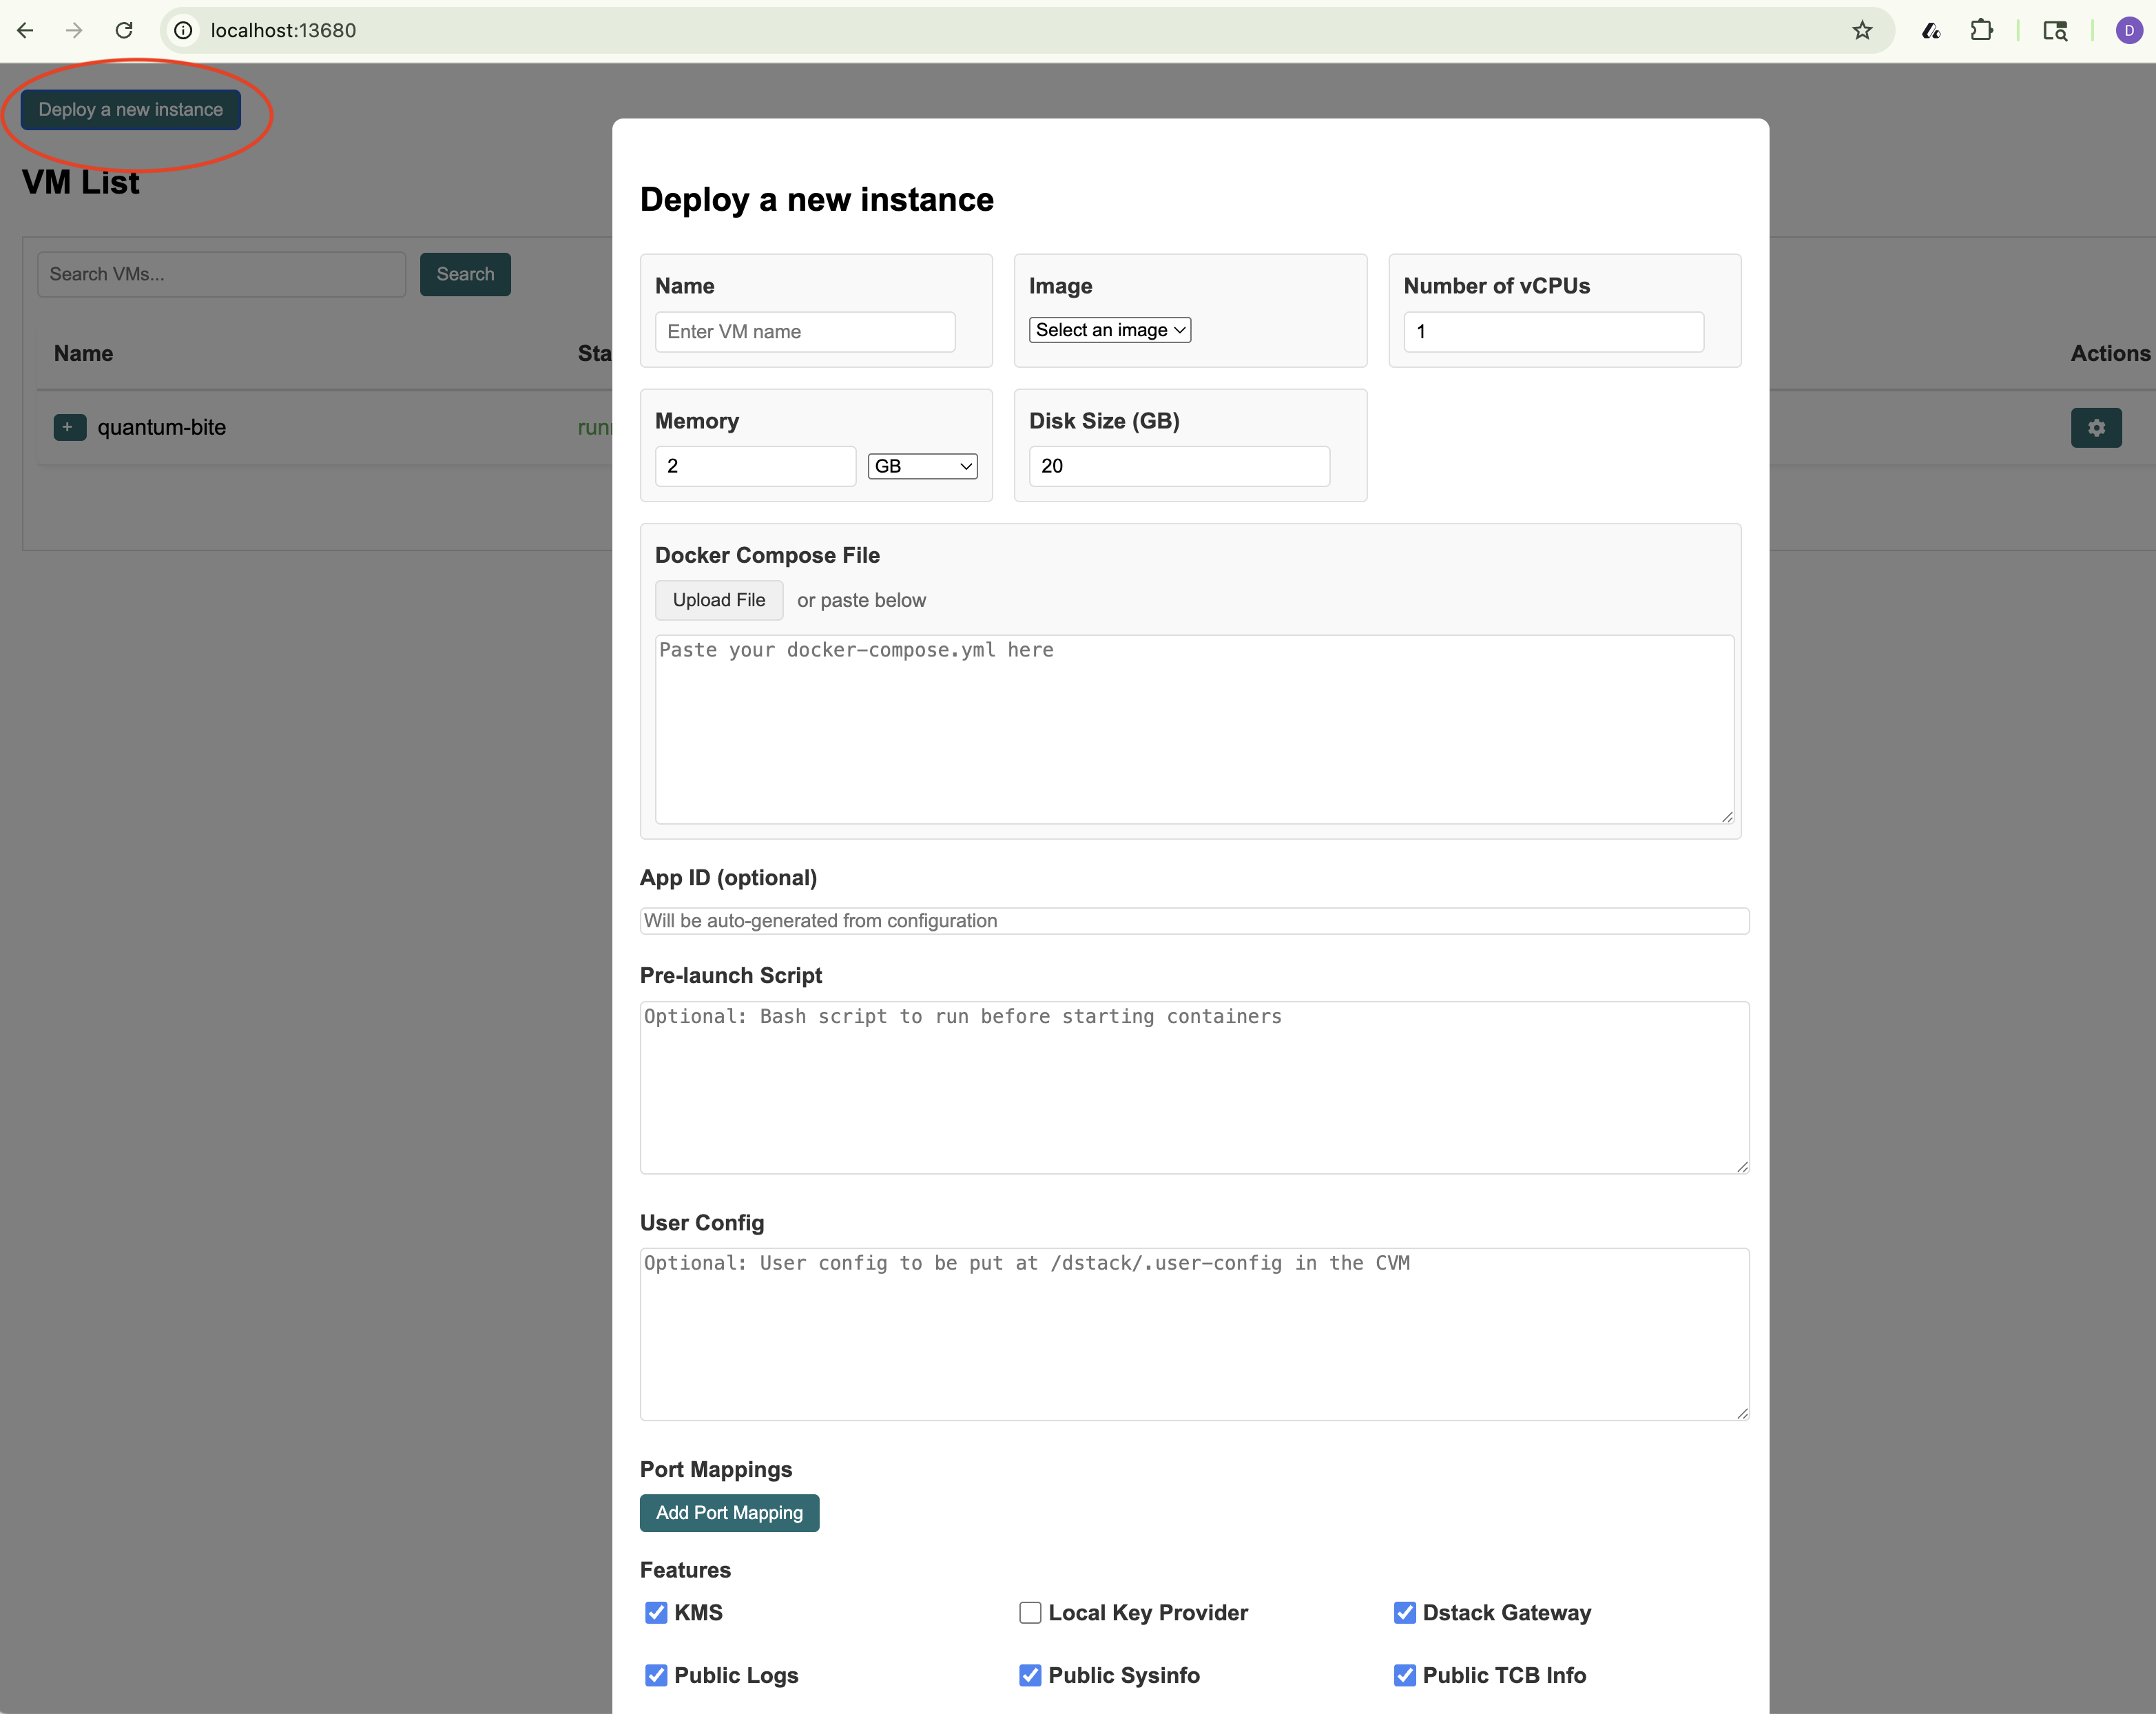
  </div>

  <div className="flex flex-col space-y-0.5">
    <span className="text-xs text-gray-600">open in your browser:</span>
    <a href="http://127.0.0.1:13680/" className="text-gray-800 underline font-medium">[http://127.0.0.1:13680](http://127.0.0.1:13680)</a>
  </div>

  <div className="flex flex-col space-y-1 mt-2">
    <span className="text-xs text-gray-600">click <strong>"Deploy a new instance"</strong> to start your first container:</span>

    <img src="https://mintcdn.com/phalanetwork/EDH2CSxg-w7_HARR/docs/images/deploy-instance.png?fit=max&auto=format&n=EDH2CSxg-w7_HARR&q=85&s=becf1d3566553b5cc6769e8058badb18" alt="deploy a new instance" className="rounded border border-gray-200 max-w-xs shadow" width="3130" height="2488" data-path="docs/images/deploy-instance.png" />
  </div>
</div>

***

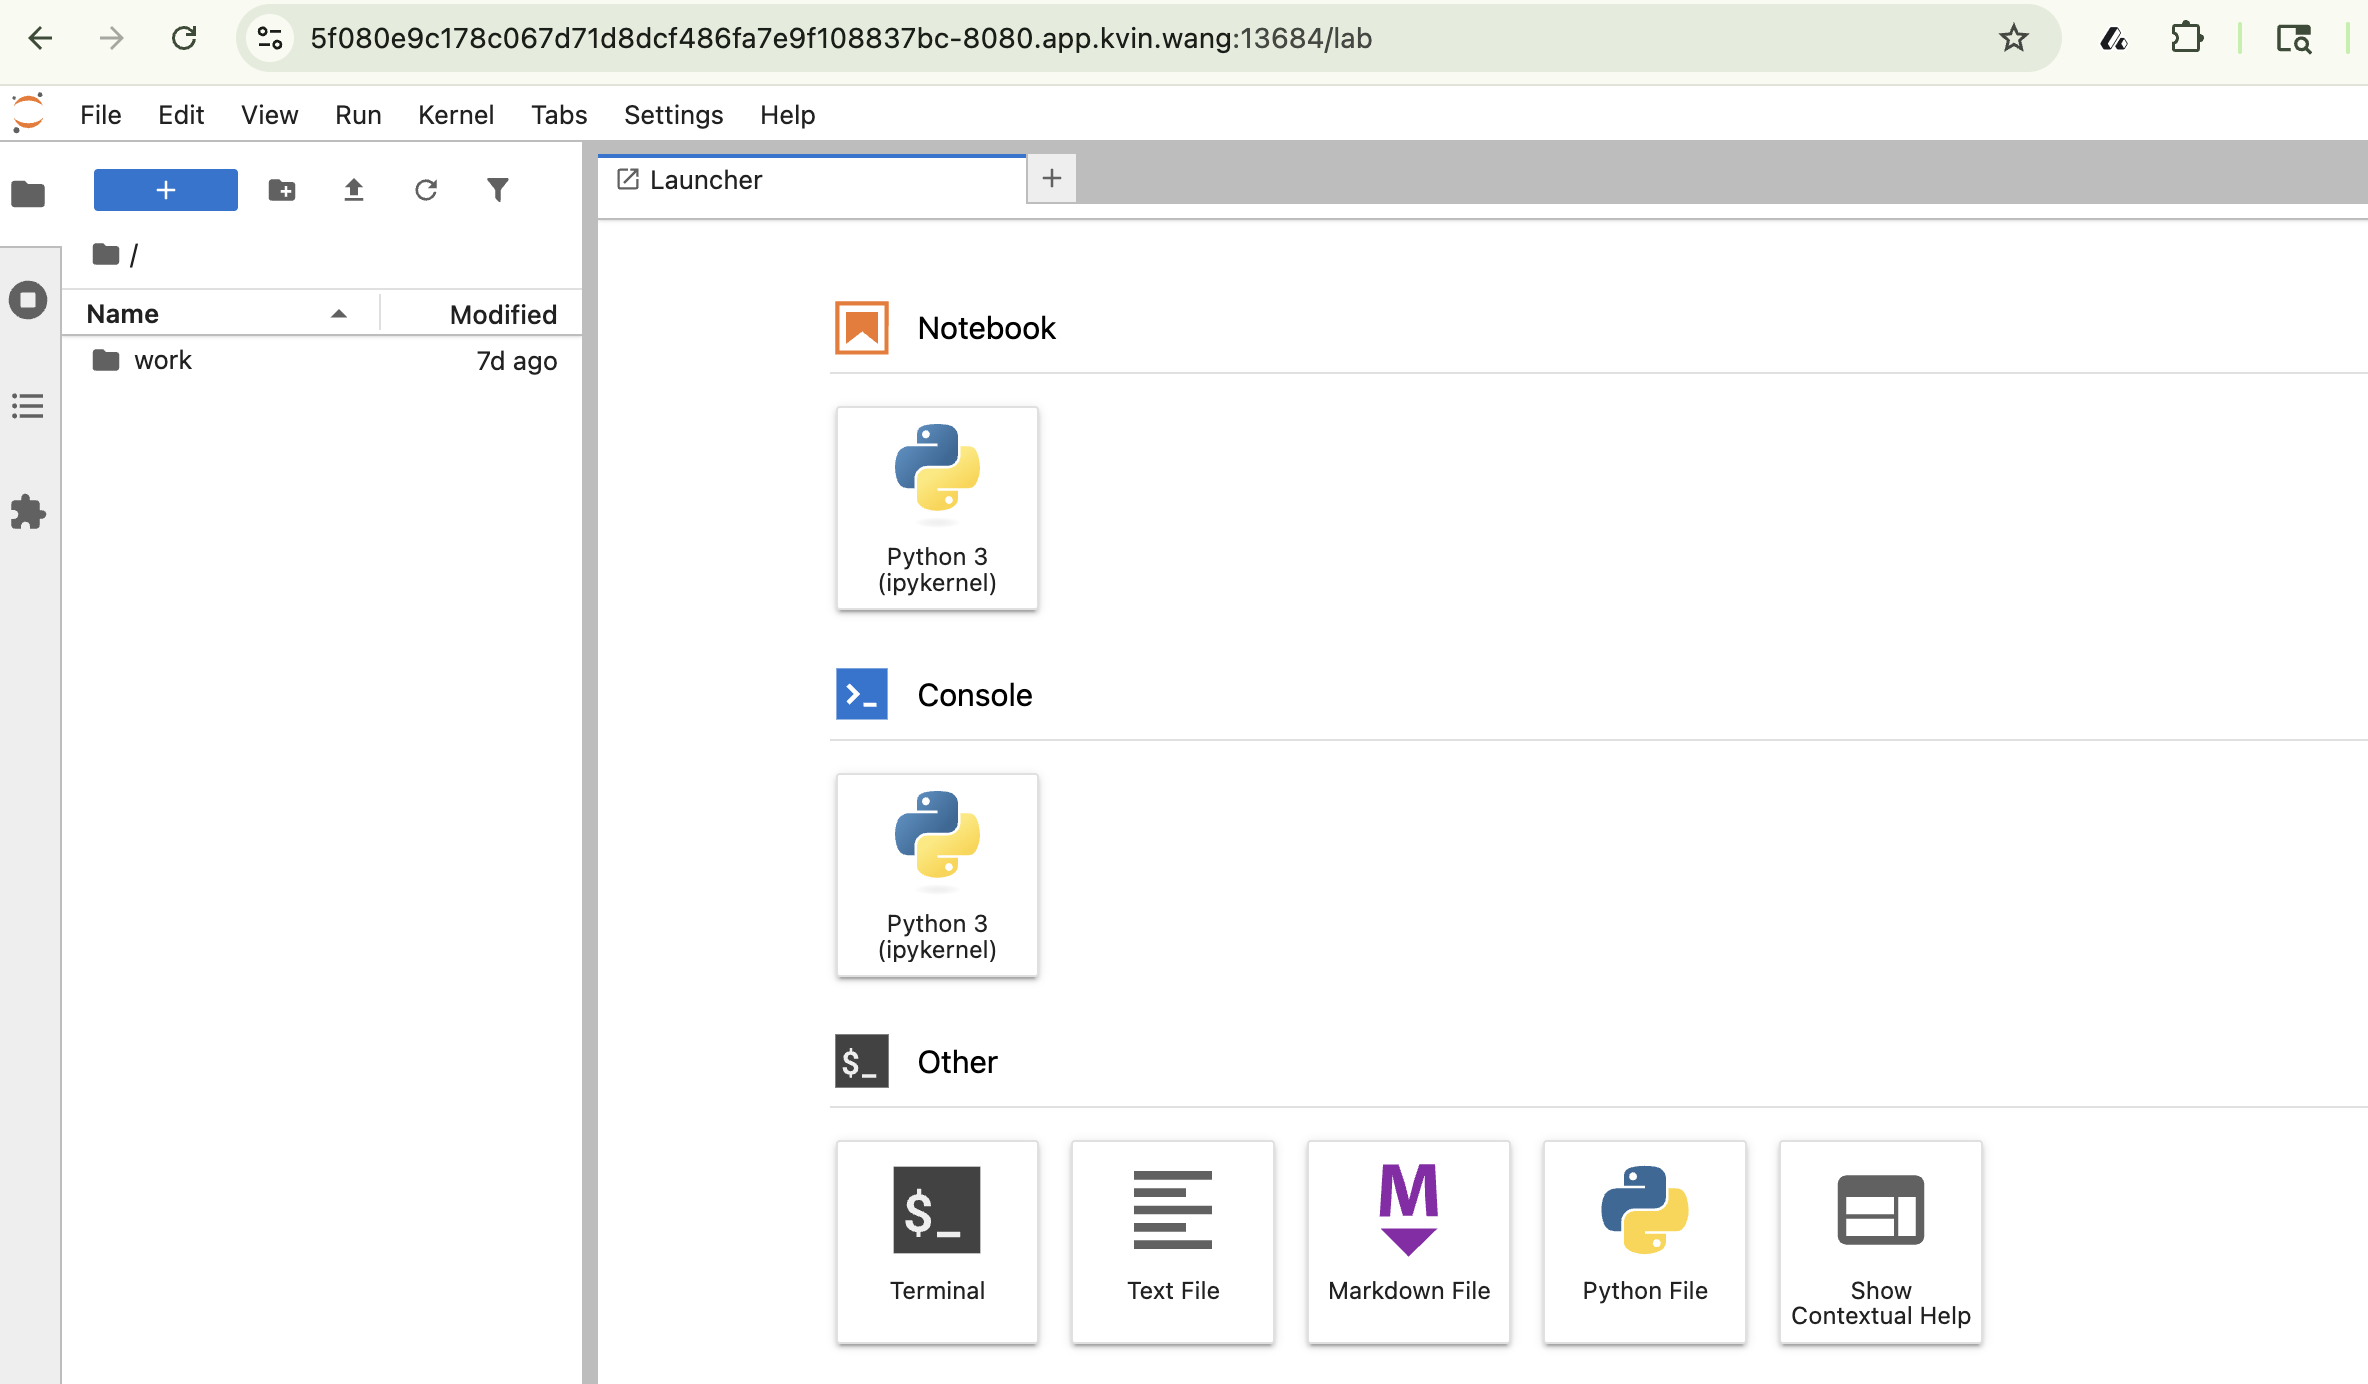
## 📓 Check Your Jupyter Notebook Deployment

First, let's confirm your VMM is running and ready. Open the dstack dashboard In Local Host in your browser. If everything is set up, you should see the Jupyter Notebook web page like this:
<a href="http://localhost/" className="text-gray-800 underline font-medium">[http://localhost/](http://localhost/)</a>

<img src="https://mintcdn.com/phalanetwork/EDH2CSxg-w7_HARR/docs/images/deploy-instance-4.png?fit=max&auto=format&n=EDH2CSxg-w7_HARR&q=85&s=9d30786b8ab91b23ae379a85c8da1eeb" alt="jupyter notebook web page" className="rounded border border-gray-200 max-w-xs shadow" width="2368" height="1384" data-path="docs/images/deploy-instance-4.png" />

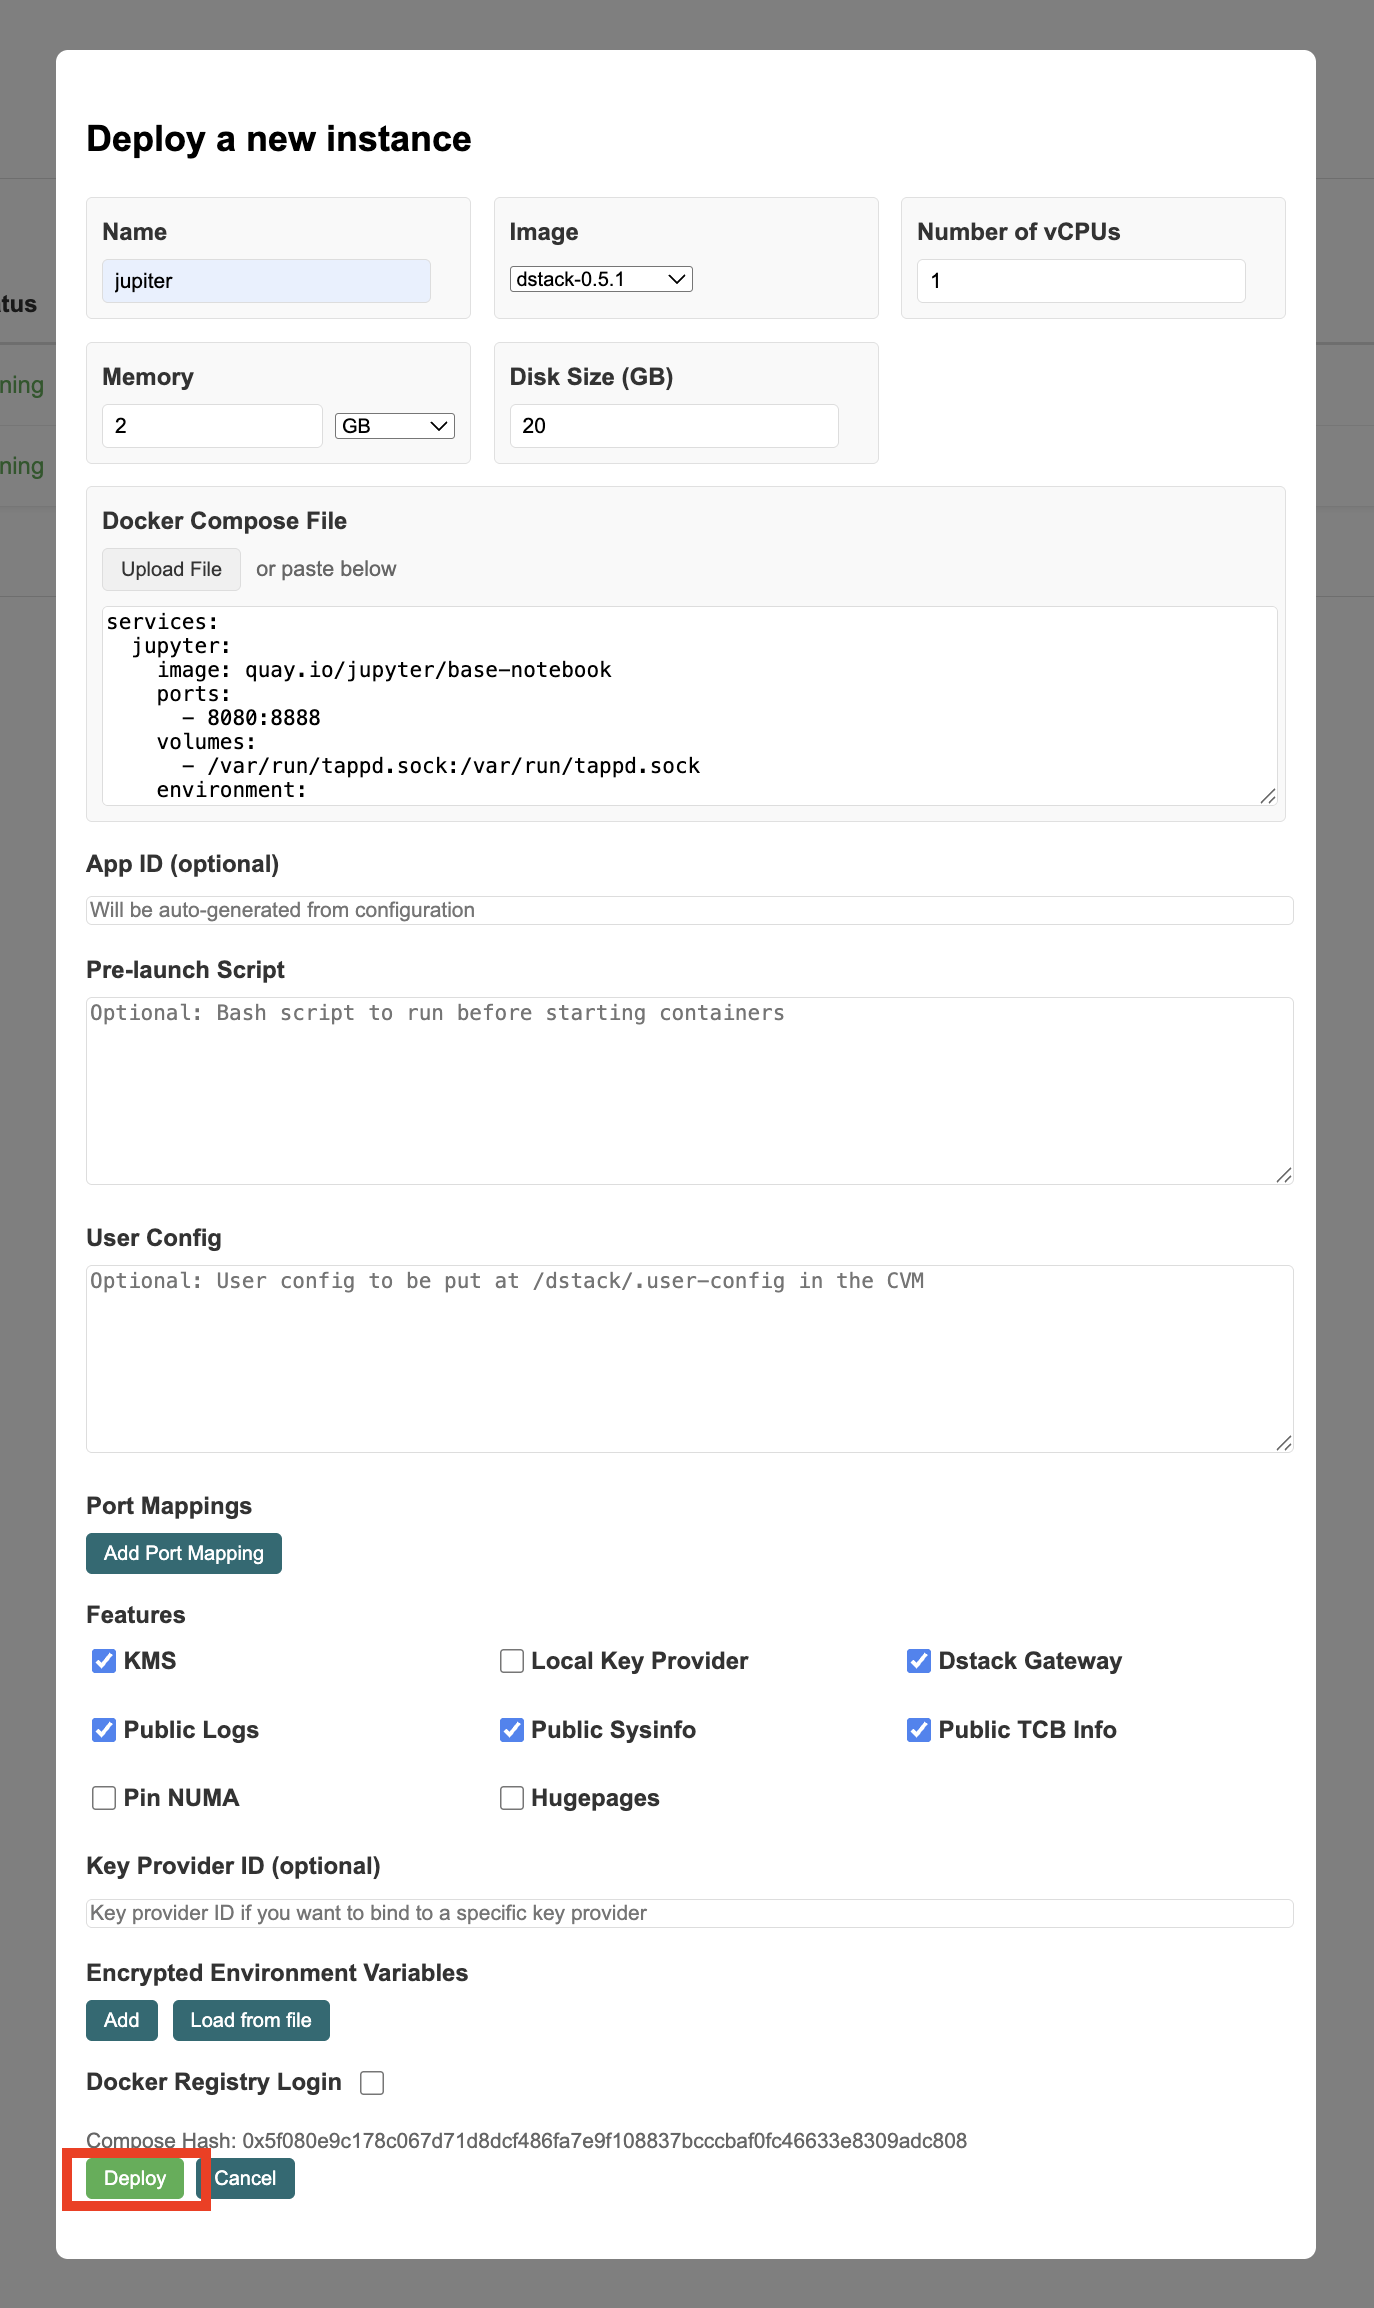
### Step 2: Add the Docker Compose YAML

Copy the following YAML and paste it into the "Docker Compose File" field in the dashboard:

<CodeBlock language="yaml">
  {`services:
    jupyter:
      image: quay.io/jupyter/base-notebook
      ports:
        - 8080:8888
      volumes:
        - /var/run/tappd.sock:/var/run/tappd.sock
      environment:
        - GRANT_SUDO=yes
      user: root
      command: "start-notebook.sh --NotebookApp.token=\${TOKEN}"`}
</CodeBlock>

<div className="mt-8 max-w-2xl mx-auto">
  <div className="flex items-center space-x-2 mb-2">
    <span className="inline-flex items-center justify-center w-5 h-5 bg-blue-100 text-blue-600 rounded-full text-xs font-bold">1</span>
    <span className="text-sm text-gray-700 font-medium">Paste your Docker Compose YAML</span>
  </div>

  <img src="https://mintcdn.com/phalanetwork/EDH2CSxg-w7_HARR/docs/images/deploy-instance-2.png?fit=max&auto=format&n=EDH2CSxg-w7_HARR&q=85&s=4df9cf86a6b037e0deea19d5e6f13415" alt="Paste Docker Compose and deploy" className="rounded border border-gray-200 max-w-xs" width="1374" height="2308" data-path="docs/images/deploy-instance-2.png" />

  <div className="mt-2 text-xs text-gray-600 text-center">
    Confirm the editor matches this example, then click <strong className="text-blue-700">"Deploy"</strong> to continue.
  </div>
</div>

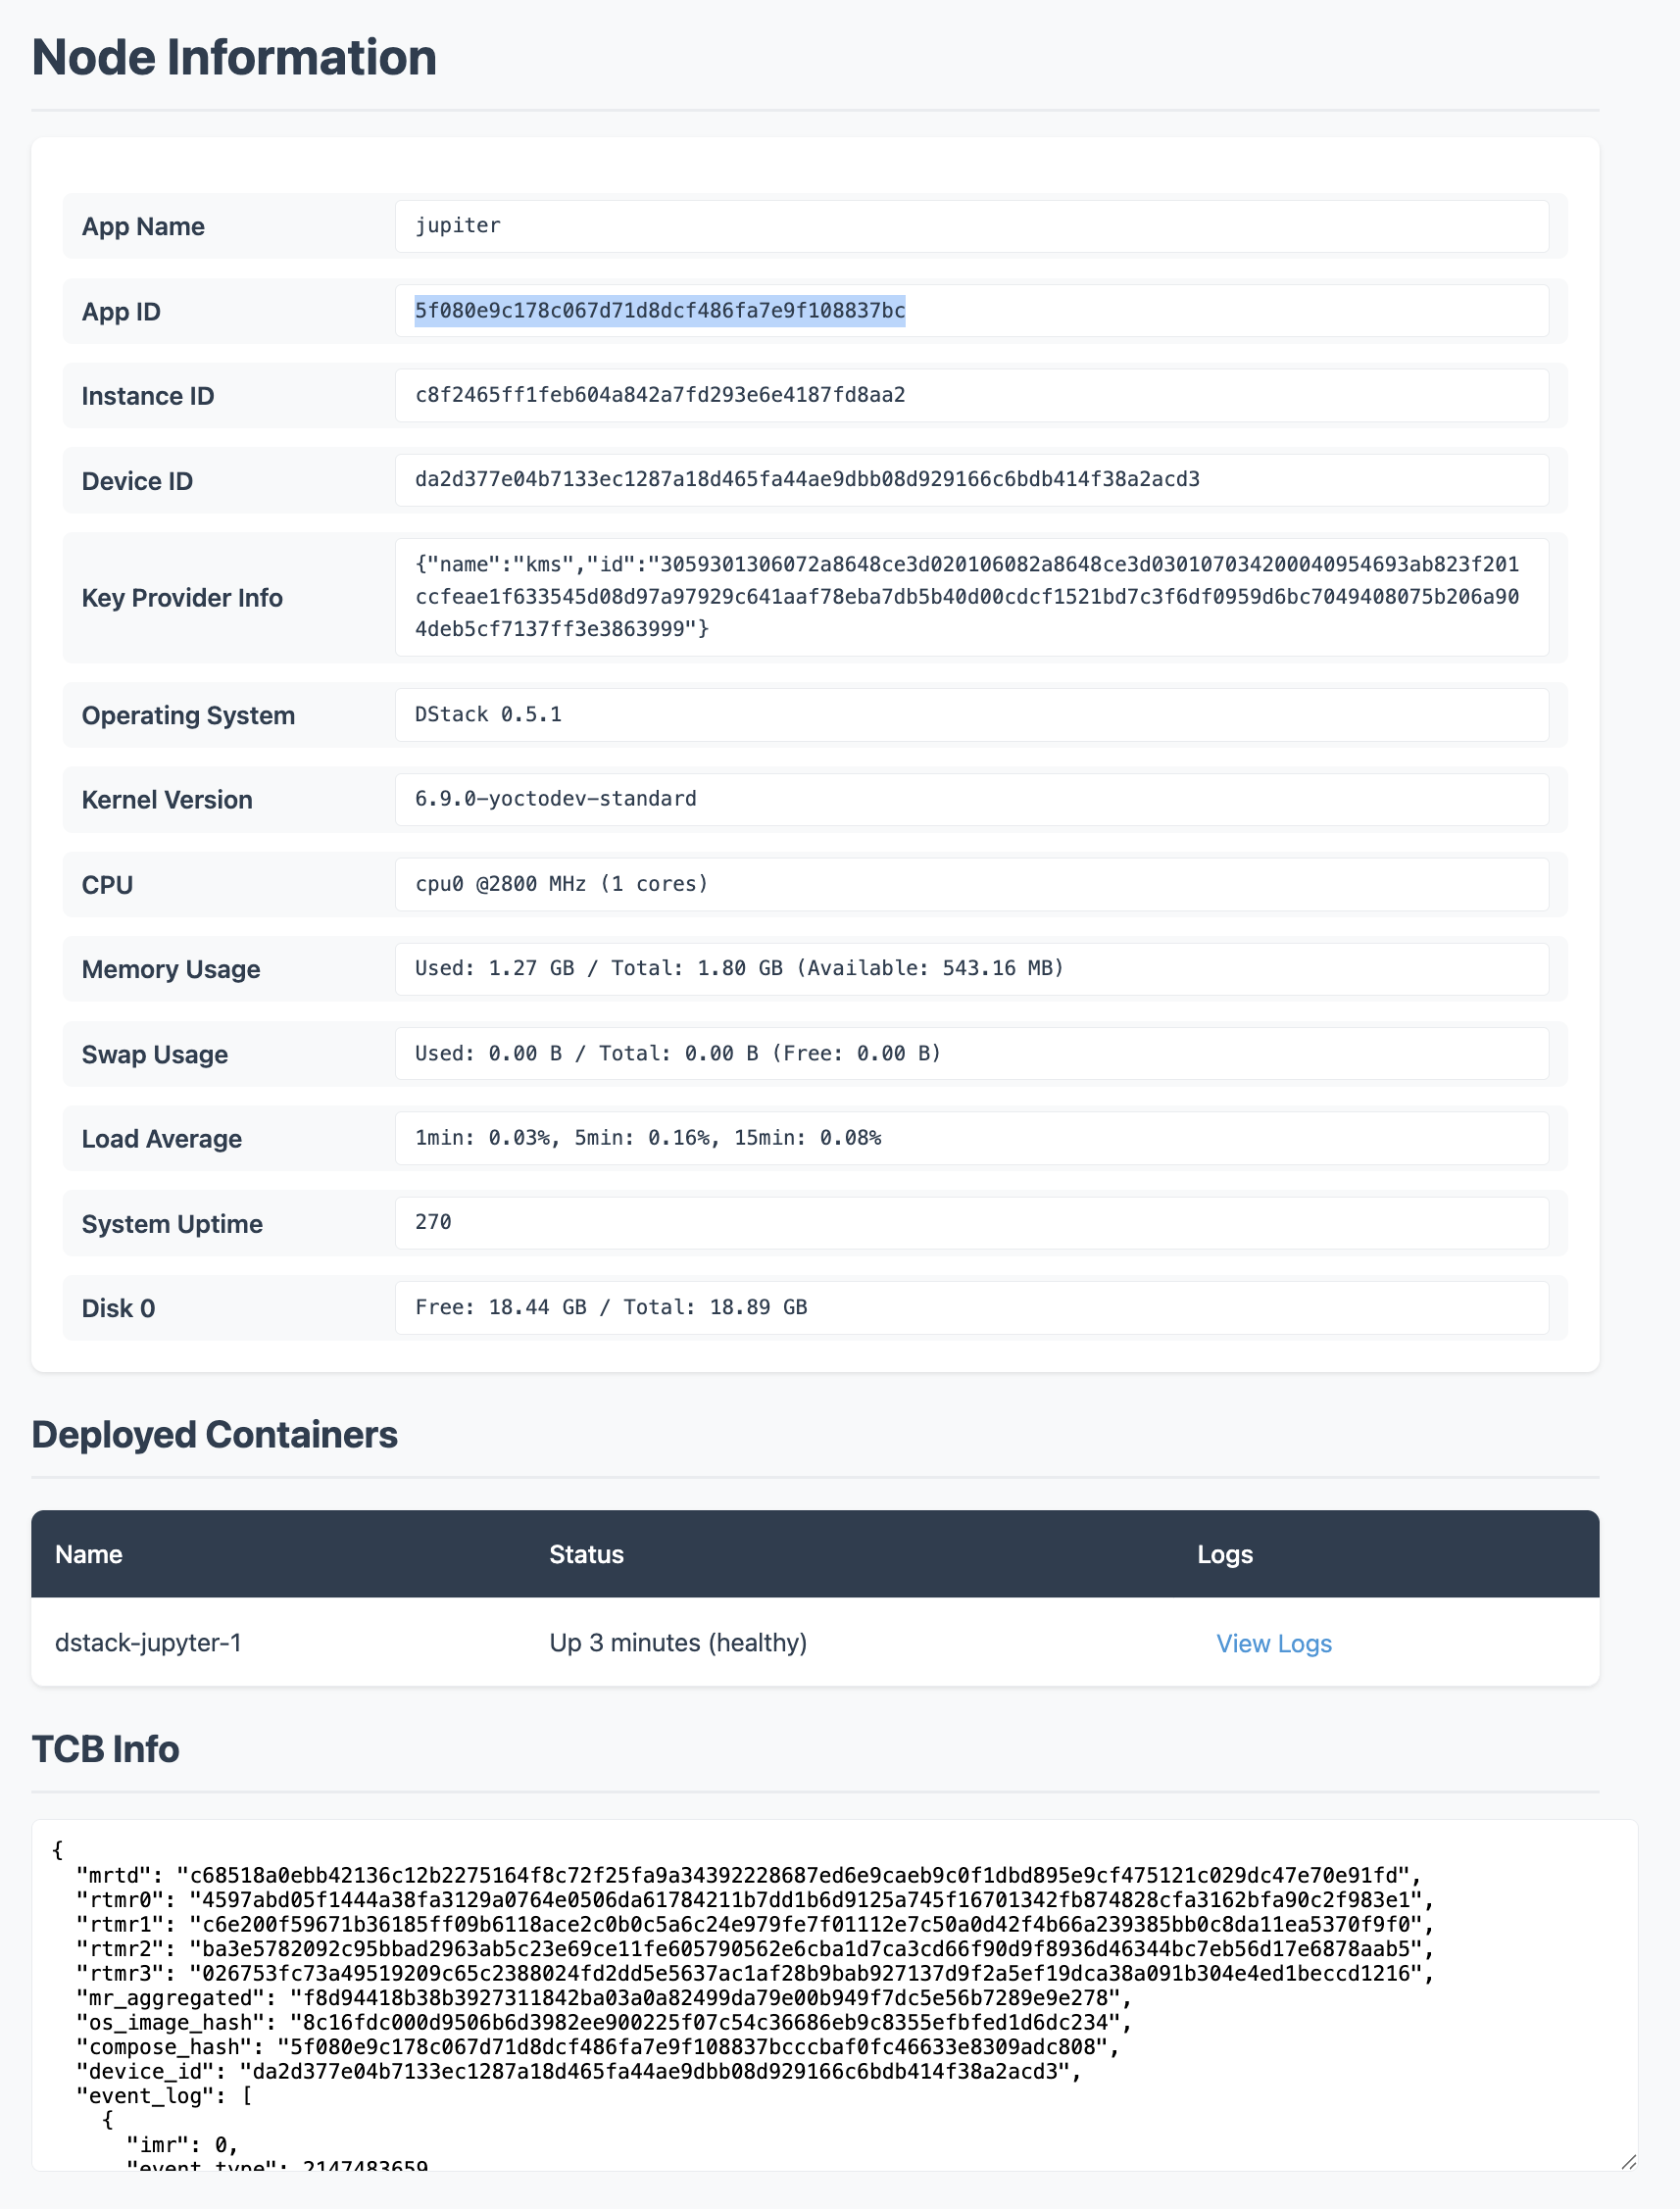
### Step 3: Launch and Monitor

<div className="max-w-2xl mx-auto mt-8 space-y-6">
  <div className="rounded border border-gray-200 bg-white p-4 flex flex-col items-center">
    <img src="https://mintcdn.com/phalanetwork/EDH2CSxg-w7_HARR/docs/images/deploy-instance-5.png?fit=max&auto=format&n=EDH2CSxg-w7_HARR&q=85&s=e06cc407f9111e56d781c61dbe04d680" alt="deployment launched in dashboard" className="rounded border border-gray-200 max-w-xs shadow" width="1714" height="2254" data-path="docs/images/deploy-instance-5.png" />

    <div className="mt-3 text-base text-gray-800 font-medium text-center">
      1. Click <span className="text-blue-700 font-semibold">Launch</span> or <span className="text-blue-700 font-semibold">Deploy</span> in the dashboard.
    </div>

    <div className="mt-1 text-sm text-gray-600 text-center">
      dstack will start your Jupyter Notebook. This usually takes 1–2 minutes.
    </div>
  </div>

  <div className="rounded border border-gray-200 bg-white p-4 flex flex-col items-center">
    <img src="https://mintcdn.com/phalanetwork/EDH2CSxg-w7_HARR/docs/images/deploy-instance-3.png?fit=max&auto=format&n=EDH2CSxg-w7_HARR&q=85&s=ae5cc4c1be53946bea4baa2137fe05d0" alt="deployment in progress" className="rounded border border-gray-200 max-w-xs shadow" width="1960" height="1562" data-path="docs/images/deploy-instance-3.png" />

    <div className="mt-3 text-base text-gray-800 font-medium text-center">
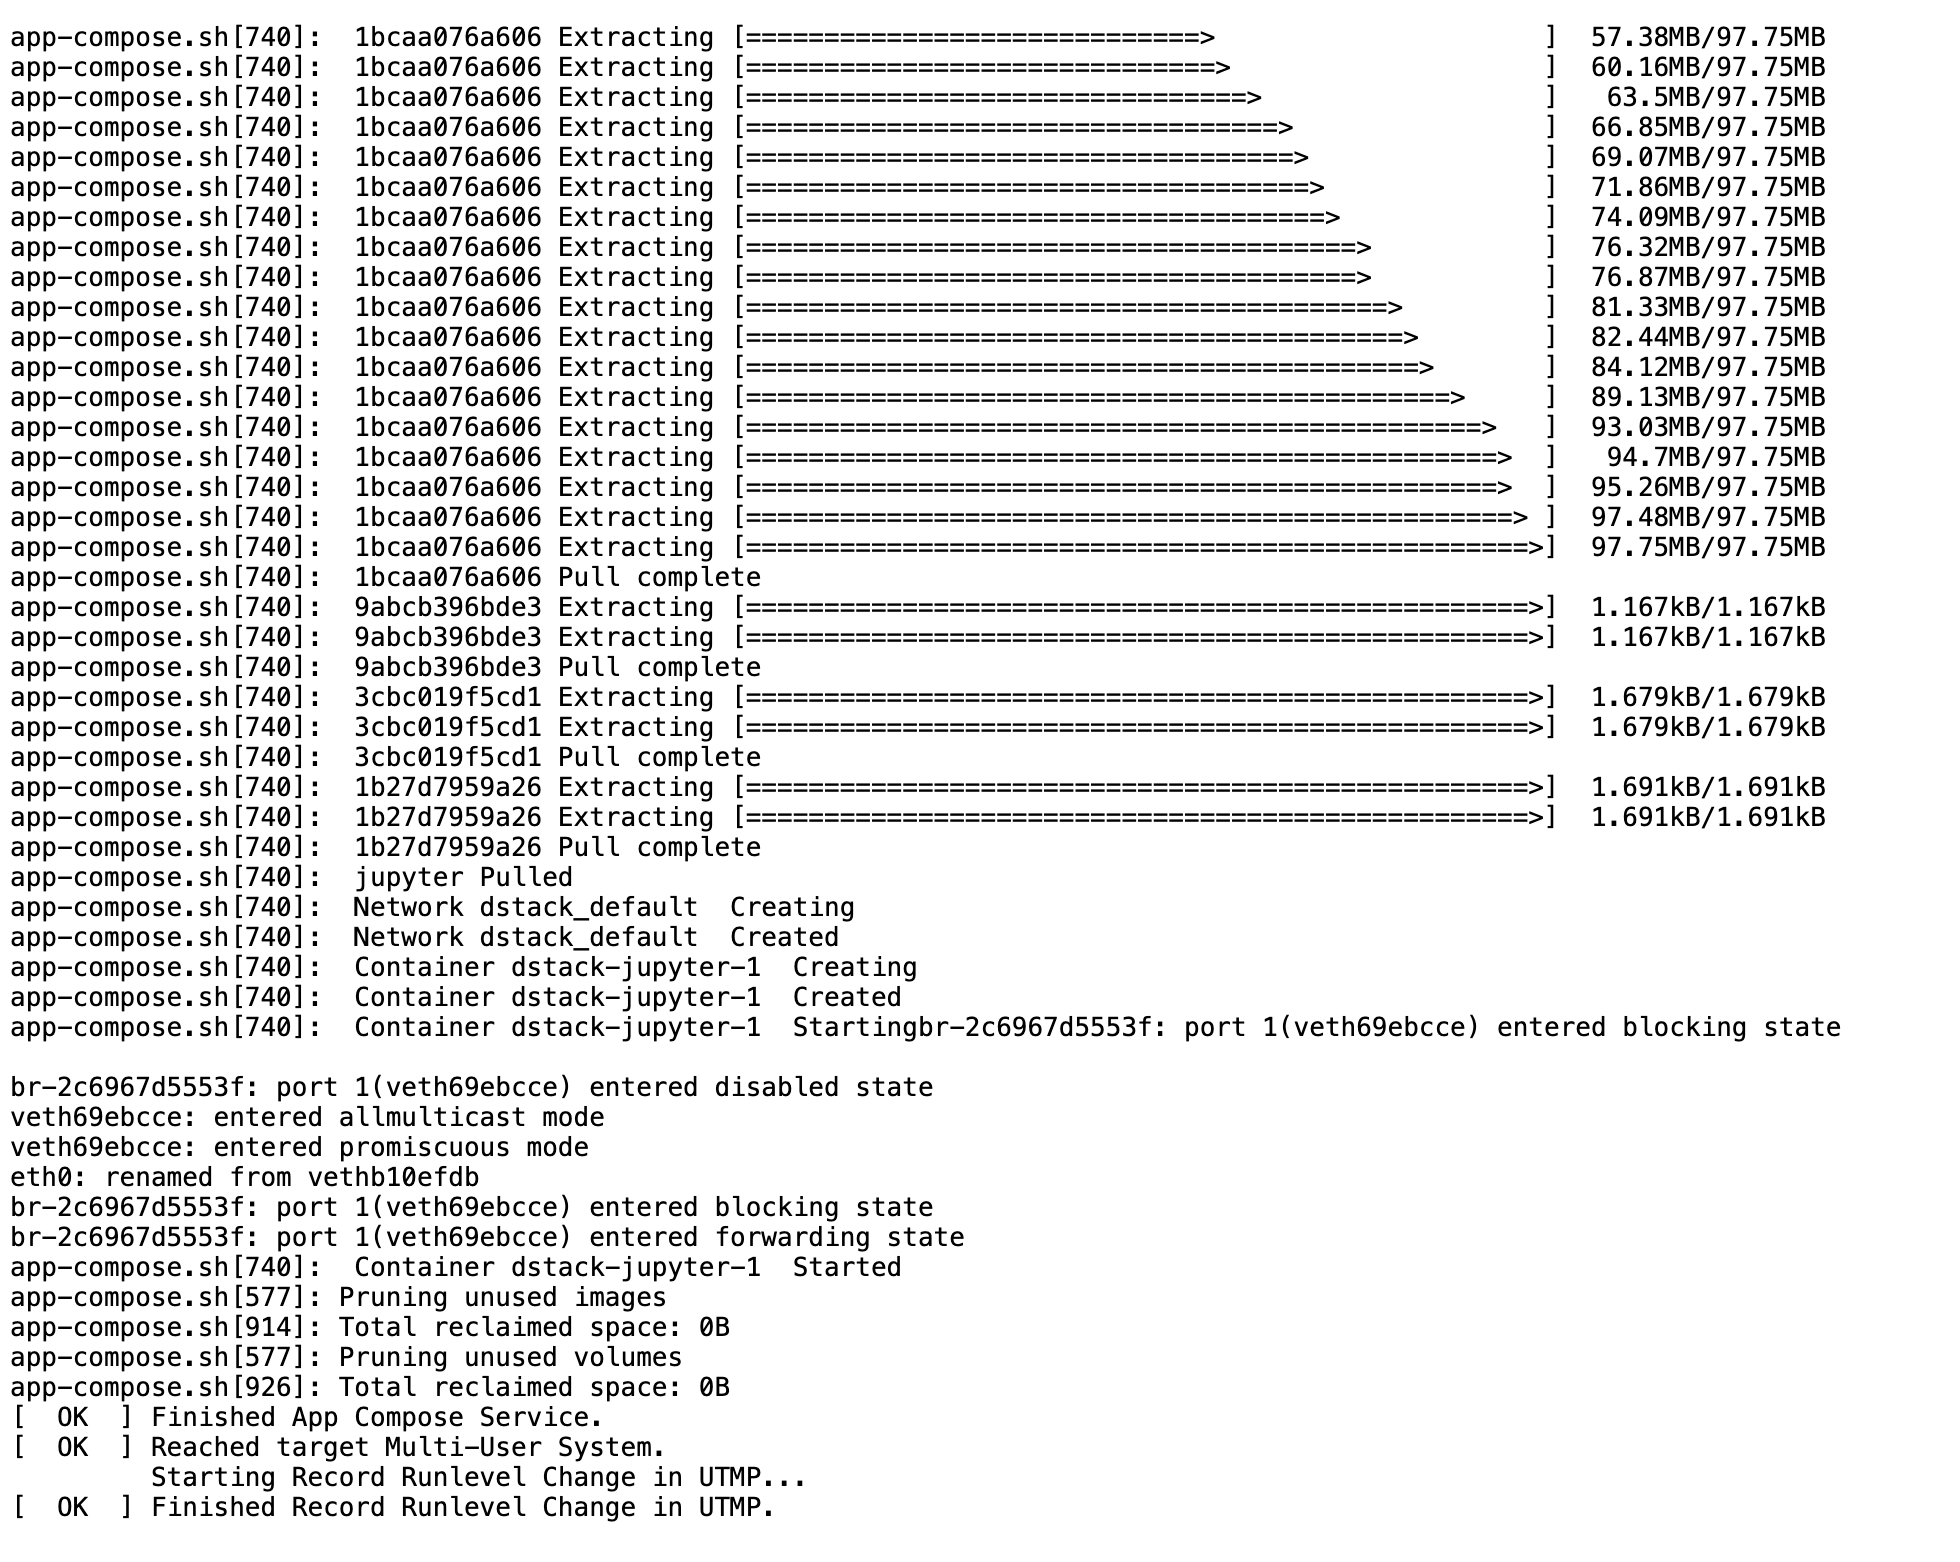
      2. Watch the progress
    </div>

    <ul className="mt-2 text-sm text-gray-600 list-disc list-inside text-left space-y-1">
      <li>Check <span className="font-semibold">Serial Logs</span> for VM boot details</li>
      <li>See container status in the <span className="font-semibold">Containers</span> tab</li>
      <li>Scroll to the bottom of logs with <kbd>Ctrl/Cmd+Down</kbd></li>
    </ul>

    <div className="mt-2 text-xs text-gray-500 text-center">
      Your deployment will appear in the dashboard as it starts up.
    </div>
  </div>
</div>

### Step 4: Open Your Jupyter Notebook

After deployment, find your app's URL in the dashboard to access Jupyter Notebook.

<CodeBlock language="text">
  https\://\<APP\_ID>-\<APP\_PORT>.app.\<host>:\<host\_port>
</CodeBlock>
